Pages

Showing posts with label Breakfast. Show all posts

Saturday, February 20, 2010

Pumpkin Streusel Muffins

by Anne

Feeding my fascination* for all things Amish,** my mom gave me this Amish Cooking book as a wedding gift.  While these Pumpkin Streusel Muffins were the first recipe I tried from the book, they certainly won’t be the last. In fact, I can honestly say that I’ve never made a better batch of homemade muffins. They were dense but not dry, and full of flavor.


The original recipe called for a loaf but... it was already 10:30 am on Saturday and I didn’t want to wait 50 minutes for a darn loaf of pumpkin bread when I knew muffins would only take 20 minutes. And I like muffins. ‘Cuz they’re like breakfast cupcakes.


The muffins will keep for a few days. I baked these guys on Saturday and we brought a batch over to my mother-in-law on Valentine’s Day. And, they still tasted amazingly fresh!  None of that day-old-and-already-dry nastiness that so often plagues my homemade baked goods. Sigh.

Some tips… 
  • Line your muffin tin with liners and spray the liners with baking spray. Don’t over-spray or the muffins will separate from the liners and you won’t be able to take cute pictures. A light misting should do. 
  • Use an ice cream scoop like this one to scoop batter into the muffin cups. It’s easy. It’s clean. And it results in well-portioned little muffins.
  • Apply the streusel generously, please. It adds a nice texture and flavor –and really, who doesn’t want a muffin covered in warm, gooey brown sugar?
I definitely plan to bake these again- but maybe I’ll plan ahead and actually make it in loaf-form. Or, if I’m feeling really adventurous, I’ll make a pumpkin bundt. I’m not quite sure how to streusel a bundt, but you better believe I’m gonna learn. So stay tuned...


Pumpkin Streusel Muffins

Muffins:
  • 2 cups all purpose flour
  • 2 tsp baking powder
  • 1 1/2 tsp ground cinnamon
  • 1/2 tsp baking soda
  • 1/4 tsp salt
  • 1 cup butter, softened
  • 1 cup granulated sugar
  • 2 eggs
  • 1 cup pumpkin (from the can, but the real stuff not the pie filling)
  • 1 tsp vanilla
Streusel:
  • 1/2 cup all purpose flour
  • 1/4 cup brown sugar
  • 1 1/2 teaspoons ground cinnamon
  • 3 tbsp butter
  • 1/2 cup almonds 
Preheat the oven to 350. Prepare your muffin tins (or, if you want to make a loaf, grease and flour a loaf pan).

For the muffins...

Combine flour, baking powder, cinnamon, baking soda, and salt in small bowl. Beat butter and granulated sugar in mixer until fluffly. Add eggs, one at a time, beating well after each addition. Beat in pumpkin and vanilla extract. Gradually add the flour mixture.


For the streusel...

Combine flour, sugar, and cinnamon in a medium bowl. Cut in butter with pastry blender (two knives, or even a food processor will do), until the mixture is crumbly. Stir in nuts.

Scoop batter into muffin cups and sprinkle streusel topping over each muffin. If you're making a loaf, the recipe suggests you layer the streusel (spoon half of the batter into the loaf pan, add half of the streusel, then spoon the remaining batter into the pan and top with the rest of the streusel)- but this seemed WAY too tedious for muffins. And, c'mon... if it's 10:30 on a Saturday and I haven't made breakfast yet... I'm obviously feeling too lazy to do something like this.

Bake for 20 minutes, or until a toothpick comes out clean. If you want to make a loaf, bake for 45-50 minutes.

So, what do y’all think? Would you give these guys a whirl or are you the kind of person who prefers a granola bar or banana bread for breakfast?

*Pun intended. Obviously.
** Sorry, Claire.

Tuesday, February 9, 2010

Banana Nut Bread

by Anne


So, I’m not very good at eating bananas before they go bad. I am, however, excellent at eating banana bread before it goes bad. Where there’s a will, there’s a way, right folks?

This recipe was gifted to me at my wedding shower- and with a minor substitution here or there (it calls for chocolate and for some reason I’m not a huge fan of chocolate in my breakfast pastries), it makes the perfect loaf of banana bread. Trust me on this one, I have tried hundreds …ok, probably more like seven… different banana bread recipes and this one is stellar.


Banana Bread
  • 1/2 cup butter
  • 1 1/2 cup brown sugar
  • 1 tsp vanilla
  • 2 eggs
  • 2 c. flour
  • 1/2 tsp. salt
  • 1 tsp baking soda
  • 1/4 cup milk
  • 1 tsp. vinegar (I used apple cider, white would work too)
  • 1 c. mashed bananas (about 3 medium-sized bananas)
  • 1 c. nuts (I used a mix of almonds, pecans and walnuts. Or, 1 c. of chocolate chips, if you like that kind of thing)
In a large bowl, combine butter and sugar. Stir in vanilla. Add eggs and beat well. In a medium bowl, sift flour with salt and baking soda, set aside. In a small bowl, make sour milk by combining vinegar and milk. Add sour milk alternately with flour to the creamed mixture. Stir in mashed bananas and nuts. Pour into two* greased and floured loaf pans. Top with a mixture of brown sugar and nuts, to taste.

*Make sure to split the batter between two loaf pans- this stuff is DENSE and one large pan will result in a mushy middle, over baked top, and a crabby baker. My husband can vouch for that.

Sunday, September 27, 2009

Well, hello there...

by Terese


I always hated the days when I would wake up late for something. You'd have to leave dirty, unshowered and tired. People would be waiting for you. There would be no parking and no matter what you did for the first little bit you would be behind. And then there's the excused. "I swear my alarm didn't go off. My car wasn't starting. I got lost." Most mean I couldn't get it together in time.

That is how I feel. Like I woke up late for the blog and, while I swear I showered, I have some catching up to do. "But I was moving all of July. And then brother Christopher and fiance Anne moved back. And then job happened. Did I mention my camera battery died and because of said move the charger was packed in a unknown box?" So sorry.

A simple bar may not be an extremely exciting way to make my entrance, but I will have you know that after the wedding in a couple weeks I will have wonderful pictures to share. And its not to say that there hasn't been baking going on. I have bananas everywhere. All the time. Not kidding, they take over my freezer. There have been plenty of banana breads and cupcakes, trials for the wedding cupcake recipes! And muffins being made to try and use up 2 foot long zucchinis.

There are so many things going on right now. Schools are starting, fall foods are here, Christopher and Anne are getting married (!) and I happened to have just started a different job. Its like my own personal back to school... without homework. The one thing that I miss the most about mornings at home is breakfast. I'm lucky if I remember to put some dry cereal in a bag before I leave. Even easier are the 2 dollar Lara bars I am consuming on an almost daily basis lately. 2 dollars everyday?! That's like 14 dollars a week! And I'm broke! (Reason I took this different job that makes me miss breakfast...) So, to counteract my 2 dollar a day habit I decided to make my own breakfast bars to take with me. Not very pretty or extravagant. Practical. Cheap and mucho grande delicious.

I give you Oatmeal with Brown Sugar and Raisins Bars. Whole wheat and with a little apple in there. They were super easy and took literally 15 minutes. The inspiration was from the Oatmeal Raisin Cookie Bars that blogger Baking Bites made a while back. But I wanted something to count as a healthy breakfast even with a whole cup of sugar in it. That's where the whole wheat flour came in and some applesauce in place of part of the butter. Now I can bring my favorite breakfast with me to enjoy with coffee while I take my break.


Whole Wheat Oatmeal with Brown Sugar and Raisin Bars
  • 1 cup whole wheat flour
  • 1/2 cup granulated sugar
  • 1/2 cup brown sugar, lightly packed
  • 1/2 teaspoon baking soda
  • 1/2 teaspoon salt
  • 1/2 teaspoon cinnamon
  • 1/4 teaspoon both nutmeg and ginger
  • 1 egg
  • 1 teaspoon vanilla
  • 1/2 cup applesauce
  • 3 tablespoons butter, melted
  • 2 cups rolled oats
  • 1 cup raisins
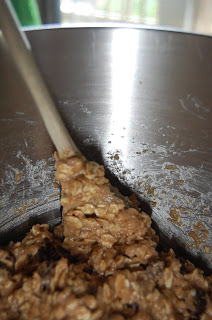
Preheat oven to 350 degrees. Grease an 8x8 in pan or line with parchment paper. Mix together the flour, sugars, baking soda, salt and spices. Make a well in the center and add the egg, applesauce, vanilla and melted butter. Stir until its all moistened together. Add the oats and raisins and stir until combined. Pour into prepared pan and spread out evenly with spatula or hands. Bake for 22-24 min. You want them to look like oatmeal raisin cookies, light golden brown.

Tuesday, August 18, 2009

Homemade Pop Tarts

by Anne


While packing up my apartment in Chicago – for an impending move to the Twin Cities- I happened upon one of these guys:

My fiancé’s pop tart container. Now, I’m pretty sure I haven’t had a pop tart since I was in high school, but the second I saw this too cute and totally unnecessary pink piece of plastic, a domestic frenzy hit. I needed to make homemade pop tarts. And they needed to be pink. With uber-cheery rainbow sprinkles.

Luckily, one of my fiancé’s sisters and her pastry-loving boyfriend were coming over for dinner. They’re always up for a good culinary experiment, and I knew they would appreciate the silliness that is homemade pop tarts.

Initially, I had hopes of making a vodka pie crust, as I’ve read that the extra moisture from the alcohol makes the whole precarious mixing/chilling/assembling process much easier. And, of course, the vodka will bake off in the oven to reveal a delicious flaky crust. Alas, we’ve had a few parties lately and there was no vodka to be had. So, I turned to the next best thing (not really): vinegar. Apple cider vinegar to be exact. It has the same “extra moisture without a sloppy crust” properties as vodka, and it’s cheap to boot!

After whipping up the pie crust, I got to work on the strawberry filling. First, I grabbed some frozen strawberries and strawberry syrup- left over from a failed attempt at one of Emeril’s strawberry pies. (By the way, I’m still annoyed with you, Emeril). Then, I threw those in the food processor with a couple of tablespoons of strawberry jam.

After the dough had chilled, I rolled it out, and cut it into 3 x 5 rectangles- I used an index card to ensure (well, let’s say “attempt”) accuracy. I lined up all the pop tart tops and bottoms on cookie sheets lined with parchment paper, and started the assembly. First, I beat an egg in a small bowl and brushed the edges of the pop tarts. Then, I scooped about a tablespoon of filling on to a “bottom” and- logically- covered the “bottom” with a “top.” I secured the sides by pressing down the edges with a fork. I also poked a few holes in the top of the pop tart, since I had (irrational?) fears of pop tarts exploding in my oven. After assembling all the tops and bottoms into lovely little pop tarts, the dough was quite soft, so I threw them in the freezer. After about 10 minutes, I grabbed the cookie sheets, compulsively trimmed the edges of the pop tarts with a knife, and tossed ‘em in the oven.

After the little guys had baked and chilled and I had (again, somewhat compulsively) poked them flat with a toothpick, I made some royal icing. I knew that I wanted the icing to be bright pink, so I used some neon pink food coloring (thanks Mom!). I made the icing a bit on the thick side, since pop tarts are notorious for having a well-defined icing edge. After gently spreading the icing on with a round-edge icing knife, I added some rainbow jimmies, and put the pop tarts in the refrigerator so the icing would set.


The verdict? Ridiculously silly but delicious. The pie crust was far fancier than Kellogg’s pop tart dough, and the icing had more flavor. It was affectionately compared to doughnut icing by the aforementioned pastry-loving dinner guest, and the whole ensemble was fondly likened to “tasty cartoon food” by my initially-suspicious-of-homemade-pop-tarts fiancé. I believe he ate three of them in one sitting.

For the sake of full disclosure, I’d have to admit that the filling was a bit blah. There wasn’t enough of it after the pie crust/pop tart had puffed up in the oven- though it was annoyingly spilling out of the sides during assembly. The flavor wasn’t spectacular either, so next time I’ll probably use more fresh fruit and skip the jam. And I’ll probably try to inject more filling after the pop tarts have baked, since I can’t seem to think of a different solution to that problem.


Pie Crust (from Bon Appetit):
  • 3 cups all purpose flour
  • 2 tablespoons sugar
  • 1 3/4 teaspoons salt
  • 1 cup plus 2 tablespoons (2 1/4 sticks) chilled unsalted butter, cut into 1/2-inch cubes*
  • 8 tablespoons (or more) ice water
  • 1 1/2 teaspoons apple cider vinegar
  • 1 egg, beaten**
Blend flour, sugar, and salt in processor. Add butter and process until coarse meal forms. Add 8 tablespoons ice water and cider vinegar; blend until moist clumps form, adding more ice water by teaspoonfuls if dough is dry. Gather dough together. Turn dough out onto work surface; divide dough in half. Form each half into ball and flatten into disk. Wrap disks separately in plastic; refrigerate at least 1 hour. Bake at 350 degree for about 15-20 minutes.***

*I only had salted butter, so I just cut down the salt in the recipe

**You’ll need the egg for assembly.

***This time and temperature is for the pop tarts. If you plan to use this pie crust recipe for an actual pie, you may need to increase baking time.


Filling:

Hmmm. It’s tough to describe. Basically, I used the some leftover filling that never set from this pie. I wouldn’t recommend it. But if you’re really that set on trying it, make the filling (strawberries, sugar, vanilla, water, brandy) and skip the corn starch- just in case your filling actually sets. Add 2 tablespoons strawberry jam.


Icing (adapted from Joy of Baking):
  • 2 cups confectioners’ sugar
  • 2 tablespoons meringue powder
  • 1/2 cup warm water
  • 1 teaspoon vanilla extract
  • Food coloring
Combine sugar and meringue powder in a medium size bowl. Add water, vanilla, and food coloring and beat with an electric mixer until stiff peaks form (at least 5 minutes). Continue to add sugar or water to reach desired consistency. The icing should be thick, but spreadable.